
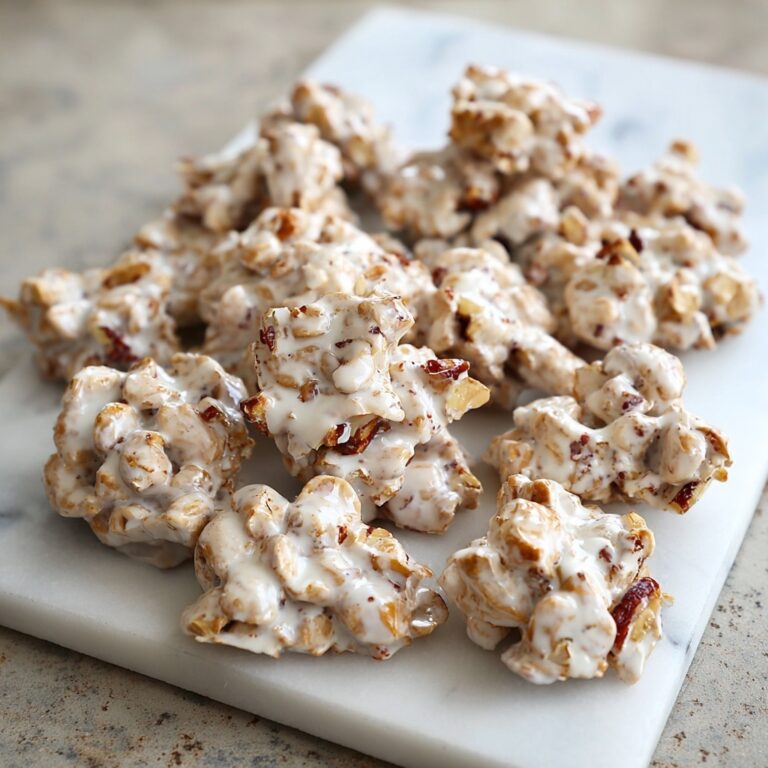
If you have a sweet tooth and a love for citrusy treats, this Lemon Cream Puffs Recipe is going to be your new best friend in the kitchen. Imagine a delicate, crisp graham cracker crust hugging a luscious, light lemon cream filling that dances on your tongue with just the right balance of tang and sweetness. Finished with a smooth white chocolate or candy coating, these little clouds of joy are both elegant and utterly irresistible. They bring together vibrant lemon flavor and gentle creaminess in every bite, making them a perfect dessert for any occasion where you want to impress without stress.
Ingredients You’ll Need
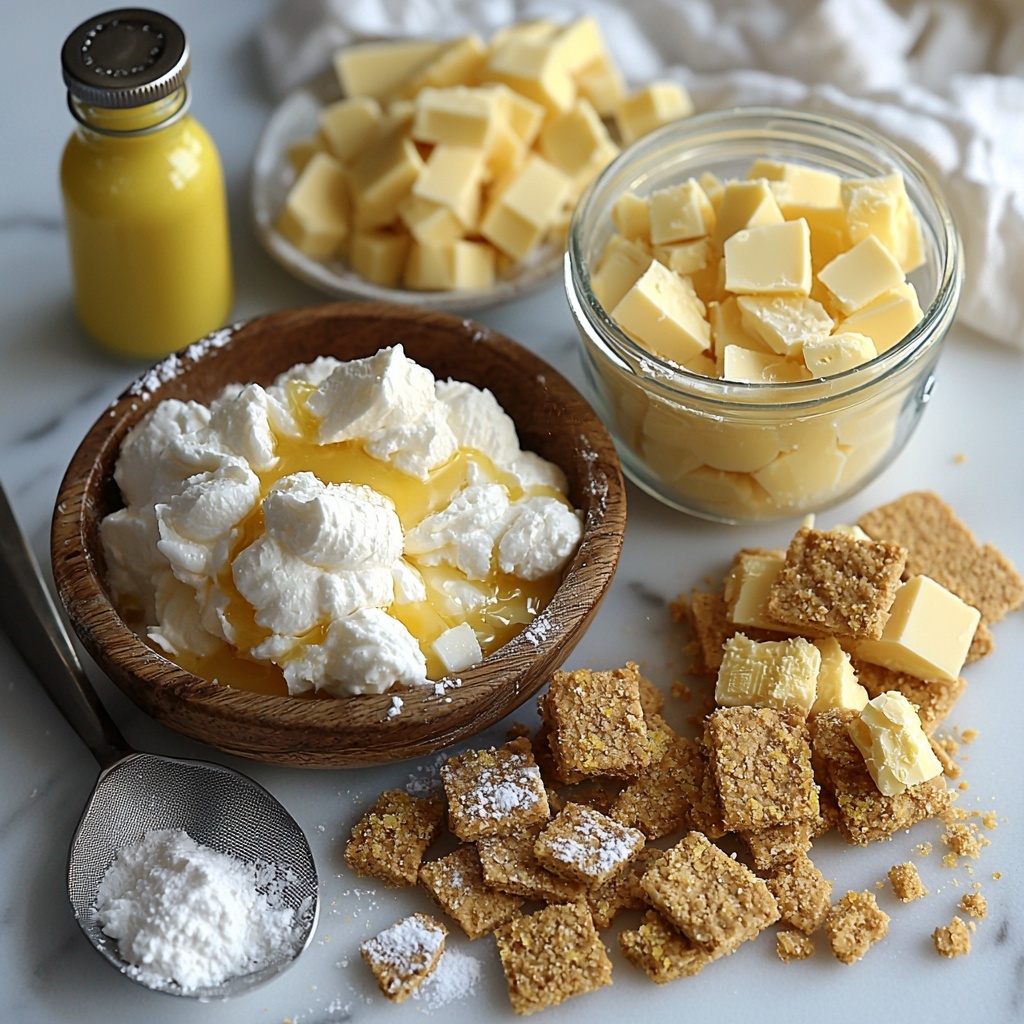
These ingredients are straightforward and incredibly accessible, yet each one plays a crucial role in crafting the perfect Lemon Cream Puffs Recipe. From the crispy graham cracker crust to the silky lemon-flavored cream, every element ensures a harmonious blend of taste, texture, and color that will leave you craving more.
- 1/2 cup graham cracker crumbs: Provides a crunchy, slightly sweet base that contrasts beautifully with the creamy filling.
- 2 tbsp melted butter: Binds the crumbs together for a sturdy crust that holds its shape perfectly.
- 1 tbsp sugar: Adds a touch of sweetness to the crust for balance against the tart lemon.
- 1/2 cup heavy whipping cream: Whipped into soft peaks to give the filling its signature light and airy texture.
- 1/2 cup lemon Greek yogurt or lemon curd mixed with whipped cream: The star of the show that infuses the filling with vibrant lemon flavor.
- 1 tbsp powdered sugar: Sweetens the filling delicately, helping to mellow out the tartness.
- 1/2 tsp lemon extract: Intensifies the citrus aroma and taste for a bright punch.
- 1/4 cup lemon curd: Added inside the filling for bursts of concentrated lemon goodness.
- 1 1/2 cups white chocolate or yellow candy melts: Melts down to coat the puffs, adding a creamy, sweet shell.
- Yellow food coloring (if using white chocolate): Gives a sunny hue to the coating, making these treats as beautiful as they are tasty.
How to Make Lemon Cream Puffs Recipe
Step 1: Prepare the Crust Base
Start by combining your graham cracker crumbs, melted butter, and sugar in a bowl. This trio will form the crunchy and sweet foundation of your cream puffs. Once mixed thoroughly, press the mixture firmly into silicone molds to create the base. Pop these into the freezer for about 10 minutes so they harden up nicely and are ready to support the luscious filling.
Step 2: Make the Lemon Cream Filling
This is where your cream puffs get their irresistible lemony soul. Whip the heavy cream until soft peaks form—that light and fluffy texture is key. Gently fold in the lemon Greek yogurt or the combination of lemon curd and additional whipped cream, along with powdered sugar and lemon extract. This mixture should be smooth, airy, and bursting with citrus flavor. Let it chill in the refrigerator for 10 to 15 minutes to firm up slightly before filling the molds.
Step 3: Coat the Molds
Next comes the magical shell. Melt your white chocolate or candy melts, adding yellow food coloring if you’re using white chocolate to give that sunny finish. Using a spoon or brush, coat the inside of each mold cavity evenly with the melted chocolate. This step seals in the filling and adds a lovely sweet exterior. Chill these coated molds in the fridge until the coating is fully set and firm.
Step 4: Fill Molds
Now it’s time to assemble! Pipe half of your chilled lemon cream filling into each chocolate-coated mold. Add a spoonful of lemon curd right in the center for a gooey surprise. Then top it all off with the remaining mousse to completely fill the cavities. This layering creates a creamy, tangy center wrapped in delightfully smooth lemon cream.
Step 5: Seal with Crust
Carefully remove the prepared crust from the freezer and gently press a crust base onto each filled mold. This seals the filling and gives your puffs that essential crunchy bottom layer. The cold crust sticking to the cold filling and chocolate casing helps everything lock together beautifully.
Step 6: Freeze Until Set
Pop your assembled puffs back into the freezer for at least four hours, or until they are fully set. This ensures the cream strengthens up enough to hold its shape when you unmold them, making serving a breeze.
Step 7: Unmold and Serve
After patiently waiting, remove the cream puffs from their molds and let them sit at room temperature for 10 to 15 minutes. This little rest softens the edges just enough for that light, melt-in-your-mouth texture that makes this Lemon Cream Puffs Recipe absolutely unforgettable.
How to Serve Lemon Cream Puffs Recipe
Garnishes
Garnishing your cream puffs can take these little beauties from stunning to show-stopping. A light dusting of powdered sugar adds just the right touch of elegance. Fresh lemon zest scattered on top boosts the citrus aroma, while tiny edible flowers or a small mint leaf can add a pop of color and freshness. These finishes invite guests to savor each bite with their eyes first, making the experience even more delightful.
Side Dishes
These cream puffs shine on their own but pair beautifully with light and bright accompaniments. A crisp green salad with a lemon vinaigrette refreshes the palate between bites. You can also serve alongside fresh berries or a small cup of chamomile tea or sparkling lemonade to keep the citrus theme flowing. The key is to balance the richness of these treats with something crisp and refreshing.
Creative Ways to Present
For a fun twist, serve your lemon cream puffs on individual dessert plates garnished with a small dollop of whipped cream and a drizzle of lemon curd. Alternatively, arrange them in a crystal-clear glass trifle bowl with layers of lemon curd and crushed graham crackers for an elegant, deconstructed presentation. For parties, consider topping each puff with a tiny, edible flower or placing them on decorative sticks for a charming lemony treat on a stick.
Make Ahead and Storage
Storing Leftovers
Any uneaten Lemon Cream Puffs Recipe leftovers should be stored in an airtight container in the freezer. Because they are delicate and filled with cream, refrigeration alone won’t quite hold their shape or freshness as well as freezing. Keeping them frozen ensures your cream puffs stay fresh and maintain their texture for up to one week.
Freezing
Freezing is your best friend when it comes to maintaining these cream puffs. Once fully set, keep them frozen until just before serving. When you’re ready to enjoy, thaw at room temperature for about 10 to 15 minutes, which is enough time for them to soften perfectly without melting. This simple step makes this Lemon Cream Puffs Recipe an ideal make-ahead dessert for celebrations or dinners.
Reheating
Reheating is not recommended for these delicate treats because warmth will soften the chocolate coating and melt the creamy filling, causing the components to lose their structure. Instead, stick to thawing at room temperature as described for the best texture and flavor experience.
FAQs
Can I use store-bought lemon curd for the filling?
Absolutely! Store-bought lemon curd works beautifully and saves time. Just be sure to fold it gently into the whipped cream or yogurt to keep the filling light and airy.
What if I don’t have silicone molds?
While silicone molds make unmolding easy, you can use mini muffin tins lined with parchment paper cups as an alternative. Just be extra gentle when removing your cream puffs to avoid breaking them.
Can I substitute the graham cracker crust with another type of crust?
Yes, you can swap graham cracker crumbs for crushed digestive biscuits or vanilla wafers, but keep in mind the flavor profile will shift slightly. The buttery, slightly sweet graham crackers complement the lemon best.
How long will these cream puffs keep fresh in the freezer?
Properly stored in an airtight container, the cream puffs will maintain their quality for up to one week in the freezer without losing flavor or texture.
Can I make these cream puffs dairy-free?
With a few substitutions such as a dairy-free whipping cream and coconut-based yogurt, you can adapt this Lemon Cream Puffs Recipe to be dairy-free, though the texture will be slightly different but still delicious.
Final Thoughts
Trust me, giving this Lemon Cream Puffs Recipe a try is truly worth every moment spent in the kitchen. The combination of crisp crust, light lemon cream, and smooth chocolate coating makes for a stunningly delightful dessert that is as fun to make as it is to eat. Whether you’re entertaining guests or looking for a special treat to brighten your day, these cream puffs deliver pure joy with every bite. So go ahead, whip up a batch and share the love and sunshine of lemon with those you care about.
Print
Lemon Cream Puffs Recipe
- Prep Time: 20 minutes
- Cook Time: 10 minutes
- Total Time: 4 hours 30 minutes
- Yield: 12 servings
- Category: Dessert
- Method: No-Cook
- Cuisine: American
Description
Delight in these refreshing Lemon Cream Puffs featuring a crunchy graham cracker crust, luscious lemon-infused cream filling, and a smooth white chocolate coating. Perfectly balanced with tangy citrus and creamy sweetness, these elegant treats are great for gatherings or a special dessert.
Ingredients
Crust
- 1/2 cup graham cracker crumbs
- 2 tbsp melted butter
- 1 tbsp sugar
Lemon Cream Filling
- 1/2 cup heavy whipping cream
- 1/2 cup lemon Greek yogurt (or lemon curd mixed with whipped cream)
- 1 tbsp powdered sugar
- 1/2 tsp lemon extract
- 1/4 cup lemon curd
Coating
- 1 1/2 cups white chocolate or yellow candy melts
- Yellow food coloring (optional, if using white chocolate)
Instructions
- Prepare the Crust Base: In a bowl, combine graham cracker crumbs, melted butter, and sugar until well mixed. Press this mixture evenly into silicone molds to form the crust base. Freeze the molds for about 10 minutes to set the crust firmly.
- Make the Lemon Cream Filling: Whip the heavy cream until soft peaks form. Gently fold in the lemon Greek yogurt (or a blend of lemon curd with whipped cream), powdered sugar, and lemon extract until fully incorporated. Chill this lemon cream mixture in the refrigerator for 10 to 15 minutes to thicken slightly.
- Coat Molds: Melt the white chocolate or candy melts until smooth. If using white chocolate, add yellow food coloring to achieve a bright lemon hue. Coat the inside of each cavity in the silicone molds evenly with the melted chocolate. Refrigerate the coated molds until the chocolate sets firmly.
- Fill Molds: Pipe or spoon half of the chilled lemon cream mousse into each chocolate-coated mold cavity. Add a spoonful of lemon curd in the center of each, then top with the remaining mousse to cover the curd completely.
- Seal with Crust: Remove the frozen crust bases from the freezer and gently press each onto the filled mold cavities to seal the cream inside.
- Freeze Until Set: Place the filled and sealed molds into the freezer for at least 4 hours, or until fully set and firm to the touch.
- Unmold and Serve: Carefully remove the lemon cream puffs from the silicone molds. Let them sit at room temperature for 10 to 15 minutes before serving to slightly soften and enhance flavor.
Notes
- Using silicone molds ensures easy removal of the delicate cream puffs without damage.
- You can substitute lemon Greek yogurt with homemade or store-bought lemon curd folded into whipped cream for a richer filling.
- Adding yellow food coloring to white chocolate helps enhance the visual appeal to match the lemon theme.
- Keep the cream mixture well chilled for better texture and to prevent melting during assembly.
- These puffs should be stored frozen until shortly before serving for best freshness and texture.


